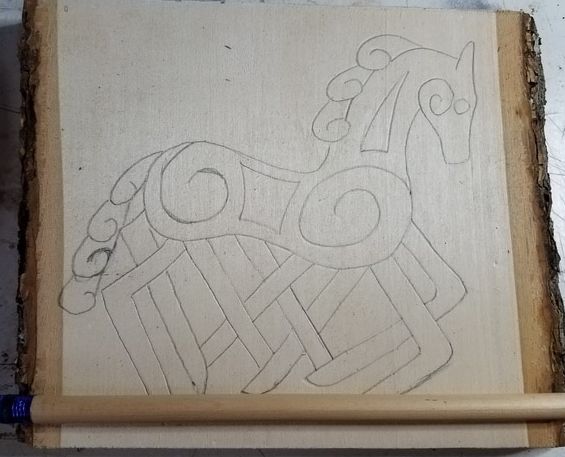
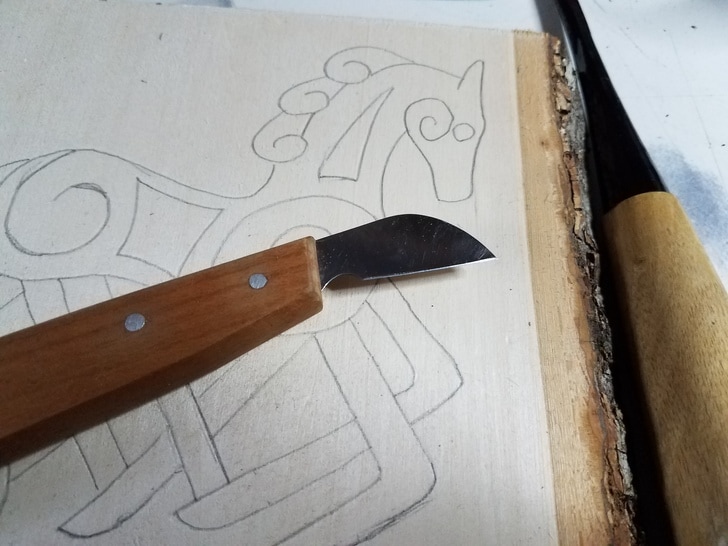
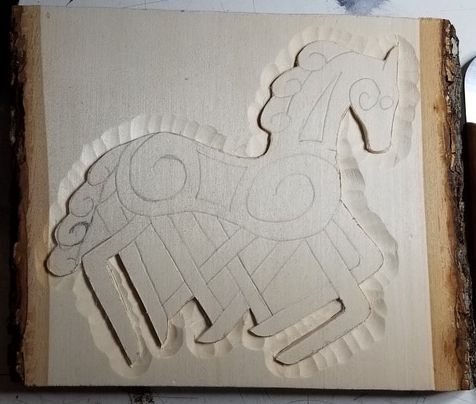
I tend to do most of my relief carving on basswood, because it's great. It's a softwood, but it has very, very tight grain, so it cuts buttery smooth. The downside is that trying to power carve with a rotary tool doesn't work at all. It fuzzes up and is generally impossible to get smooth again. So hand tools it is. The next step was to transfer the design over to the wood. Because basswood is so soft, I don't bother with carbon paper (also because I don't have any). I just use a ballpoint pen and press the design down into the wood. 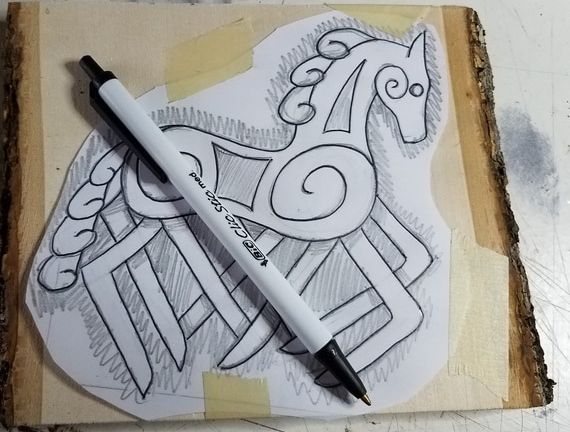 Like so! This leaves an outline dent in the surface of the wood, which I darken up with a pencil.
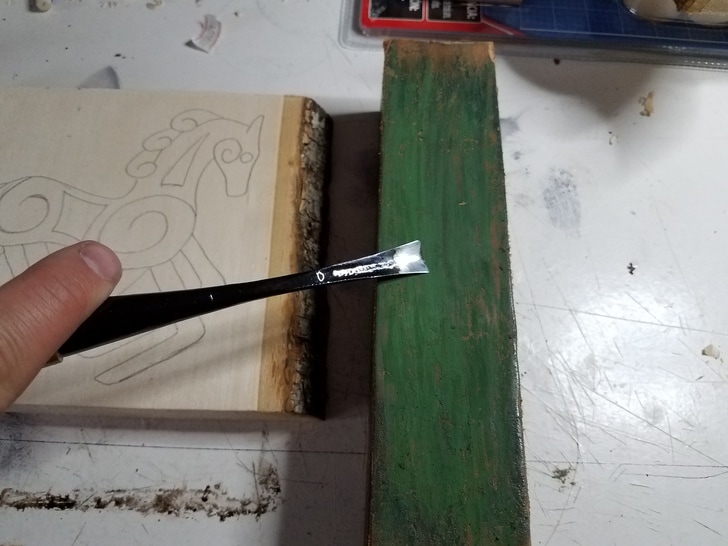
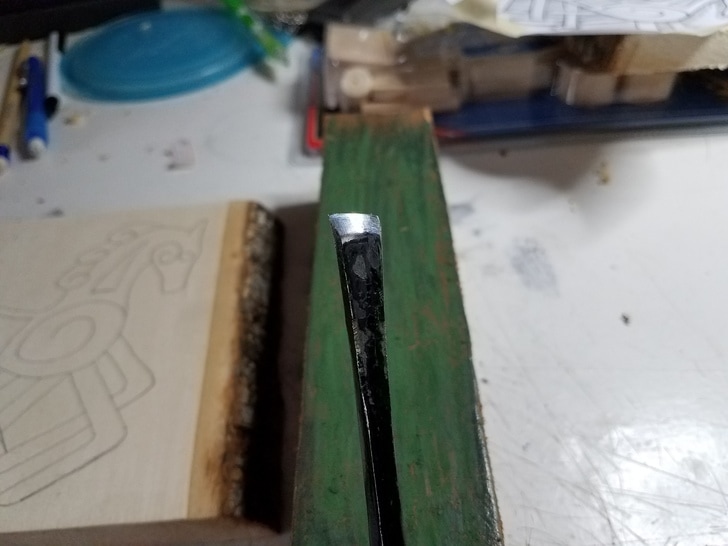
Once I had a knife wall around the whole outside of the design, I sharpened up my big flat fishtail gouge. It's about 1cm wide, and has a very shallow dish to it. To hone it up, I use a stropping block I made from a hunk of walnut, to which I glued a slice of vegetable-tanned leather. I rub the leather with green honing compound, and draw the tool across the treated leather. Always strop your tools from the back of the blade to the edge. This removes the burr that comes from stone sharpening and using the tool. It also ensures you don't dig hunks out of the leather surface.
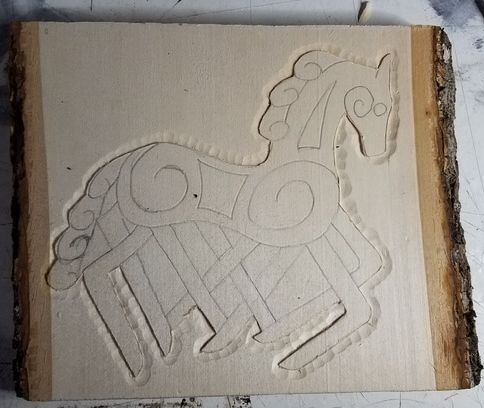
I worked my way around the piece, pushing the gouge gently toward the knife wall, taking shallow cuts all the way around the design. Then I went around a second time, cutting deeper to make the design stand out more from the background. Sometimes, if I cut deeper than the knife wall, I'd have to trim the chips away with the chip knife. I had to be really careful and slow around the ends of the legs and between them. There was a real risk of chipping a bunch of material out accidentally.
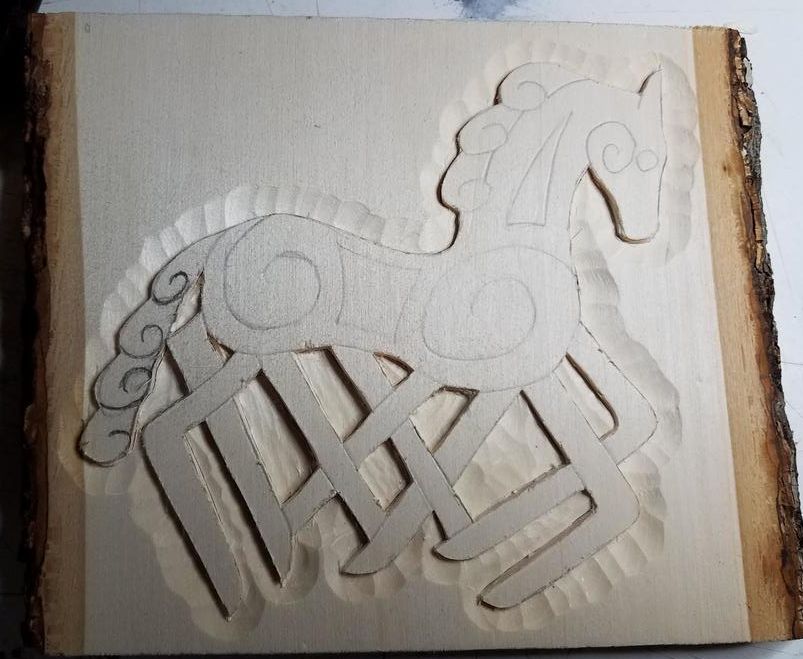
Once I was satisfied with the depth of the border, I started cutting down the spaces in between the legs, and the little designs on the body and neck of the horse. I used the same technique here. Knife wall to protect the figure, then gouges to deepen the background. For the smaller spots, I had to switch to a narrower gouge that would fit the space. I even used my spoon-bit gouge, which has a funky kink in its neck, to get to some of the really little spots.
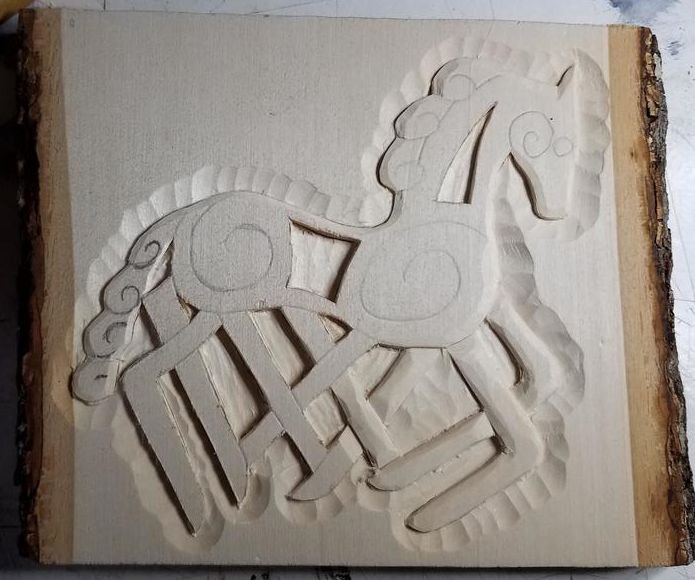
The final step before finishing the wood was to smooth out all the rough cuts. This isn't entirely necessary, depending on your aesthetic sense, but I like things smoother generally. I used a couple of little rifflers, which are basically really funny-shaped files, to smooth out the entire cut portion of the figure, rounding everything off, and getting rid of all the jaggy little edges I left in the previous steps. 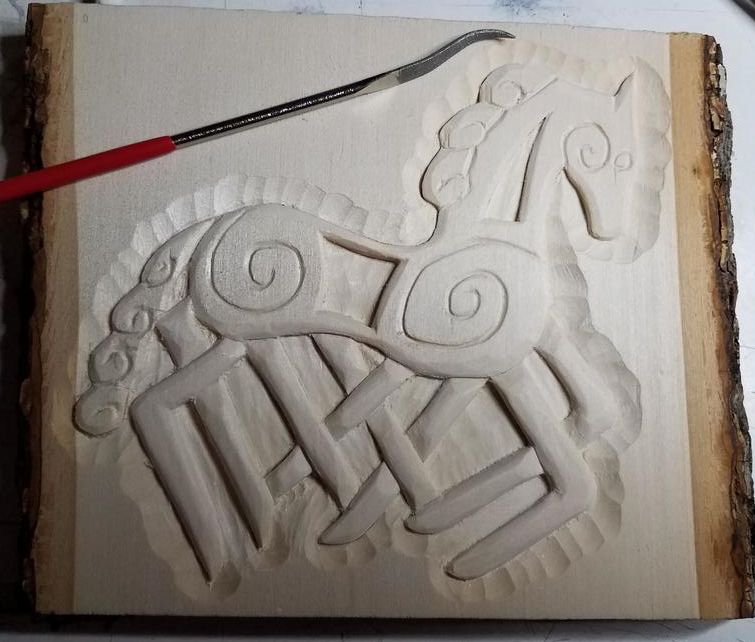 Riffling in progress. Look at the difference between the front and rear legs. Also: I love the word 'riffler'. It's so much fun to say. Try it! Riffling in progress. Look at the difference between the front and rear legs. Also: I love the word 'riffler'. It's so much fun to say. Try it! Once everything was nice and smooth, I used a cheap hardware store chip brush to apply a generous coat of boiled linseed oil. This stuff makes basswood look *beautiful*. Grain that you didn't know existed pops right out, and the whole piece takes on this satiny sheen, and a lovely honey-colored glow. See for yourself. 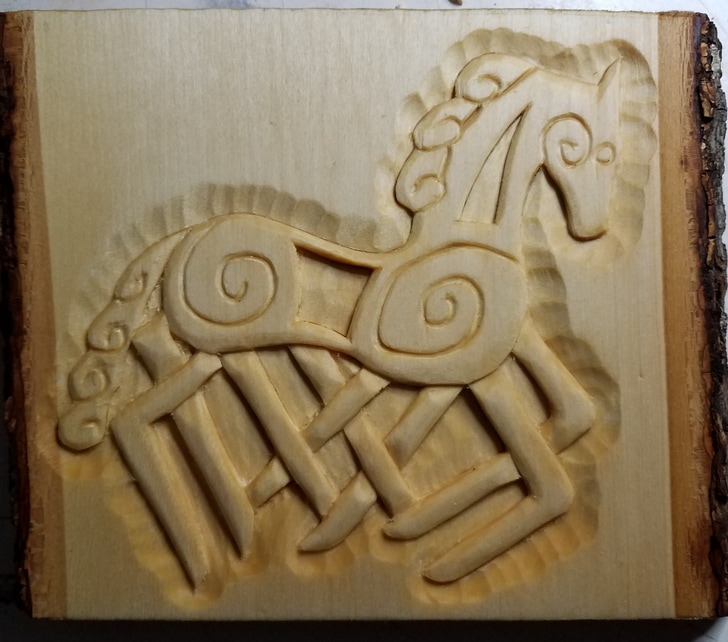 And that's it! Thanks for reading, and stay tuned for more makings.
0 Comments
I really didn't feel like the wand project was complete. The poor thing just looked so lonely, sitting on its side on a shelf, or my desk, or wherever. It needed a good place to be. A place of distinction and respect. So I grabbed a hunk of Brazilian cherry wood I bought about 6 years ago, found a pretty steeple-grained section, and hacked it off. Then, using techniques I learned doing my twisted copper torcs, I made a pair of uprights to rest the wand on. Then, I planed, sanded, drilled and oiled the cherry base, glued in the uprights, and, well, take a look: 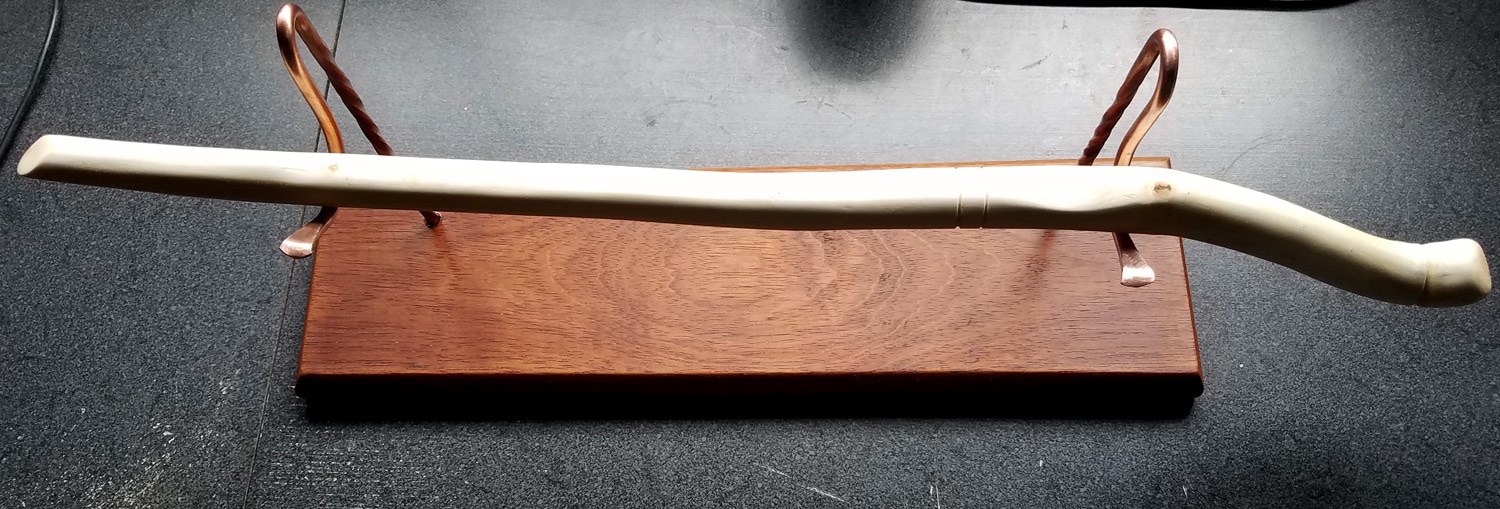 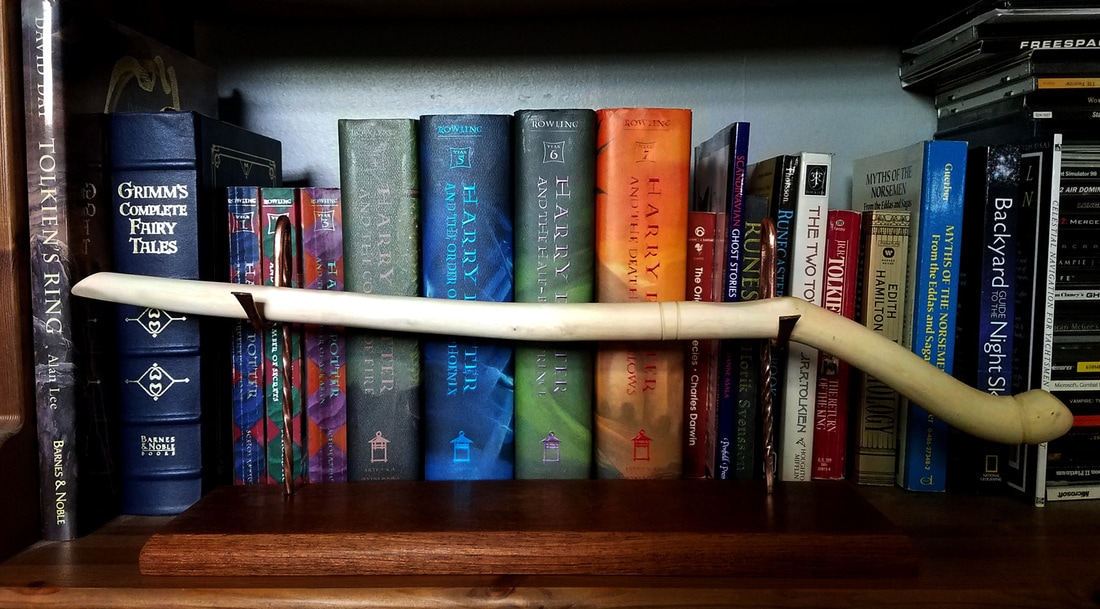 Not every wizard operates within the confines of the city, or even what most would call the "civilized world". There are those who strike out on their own, into the wild places where people don't dare to tread. They seek untouched places, unseen vistas, and unnamed creatures in the lonely, dark wilderness. This is a wand for one of them. 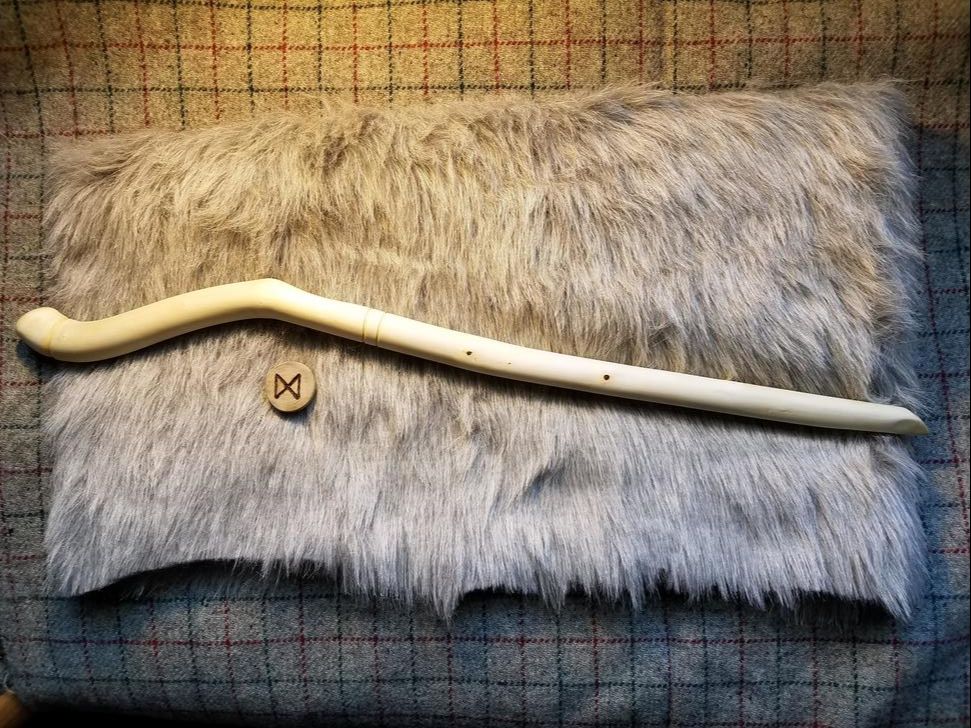 Crafted from wild-cut white maple, and carefully shaped to preserve the natural bend of the tree's will, this wand cradles the hand, and is less susceptible to disarmament due to physical altercation, or expelliarmus. 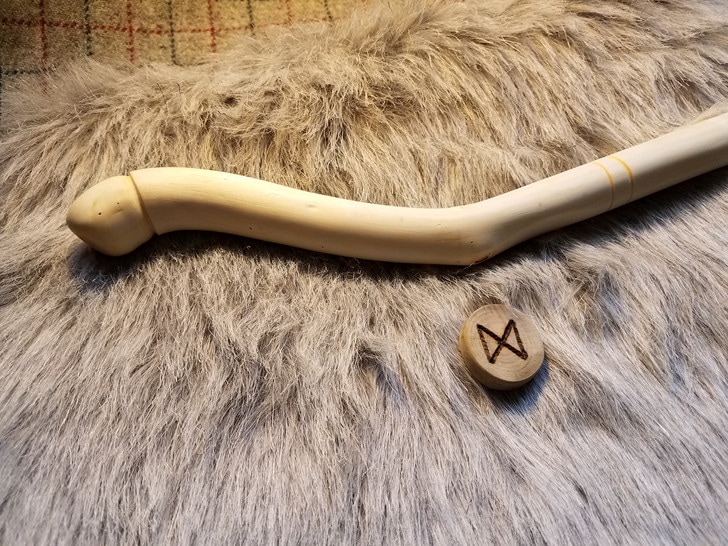 From its grip to its tip, to its hemlock root core (shh. not really), this wand is created for the natural wizard. Rangers, wanderers, tamers, and guides alike. 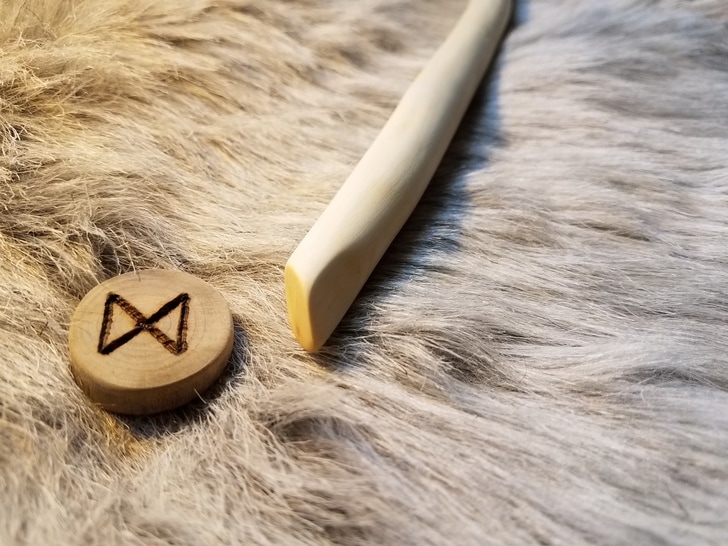 Sorry folks, this one's not for sale.
The ConceptIn the Mistborn series by Brandon Sanderson, nobles carry what are called "Dueling Canes". I'm not too far along in the first book, but the idea intrigued me. What if nobility could settle differences via nonlethal combat, with something like a classy Shillelagh? I decided to make a walking stick with some swordlike qualities. It had to look like an inconspicuous cane, be comfortable to grip in an offensive stance, and be durable enough to last through (at least) one good walloping. The MaterialsI'm running on a tight budget, so this was gonna be a hardware store build. No fancy exotic woods for me. My choices were a hickory sledge hammer handle ($10ish) or a 1 1/8" red oak dowel ($7ish). I went for the oak dowel, partly because it was cheaper, but also because I got a full three feet out of it, where the hammer handle would have needed cutting to remove the accommodations for the hammer head. I also wasn't crazy about the rough finish on the hickory handle, which would have meant sanding it off. On the way home from Home MegaLowe's, I stopped off at the hobby shop for a 2" hardwood ball to act as the topper/handle/pommel for the cane. Cost about $1.50. So all in all, we're down about $8.50. The only other materials I used were scrounged in my garage. A lag bolt for the bottom end to keep the wood from banging on concrete surfaces, some polyurethane to shine and seal, and a couple dabs of wood glue. The BuildI started off with the ball, since that had the greatest chance for disaster. Without any kind of good jig or vice to use in my drill press, I was gonna have to go it by hand. I started the hole with a 1" hole saw, then hogged out the material left in the core with a 1" spade bit. I probably could have gotten away with just the spade bit, but those things tend to leave really rough edges. It was nerve wracking, but it worked pretty well. 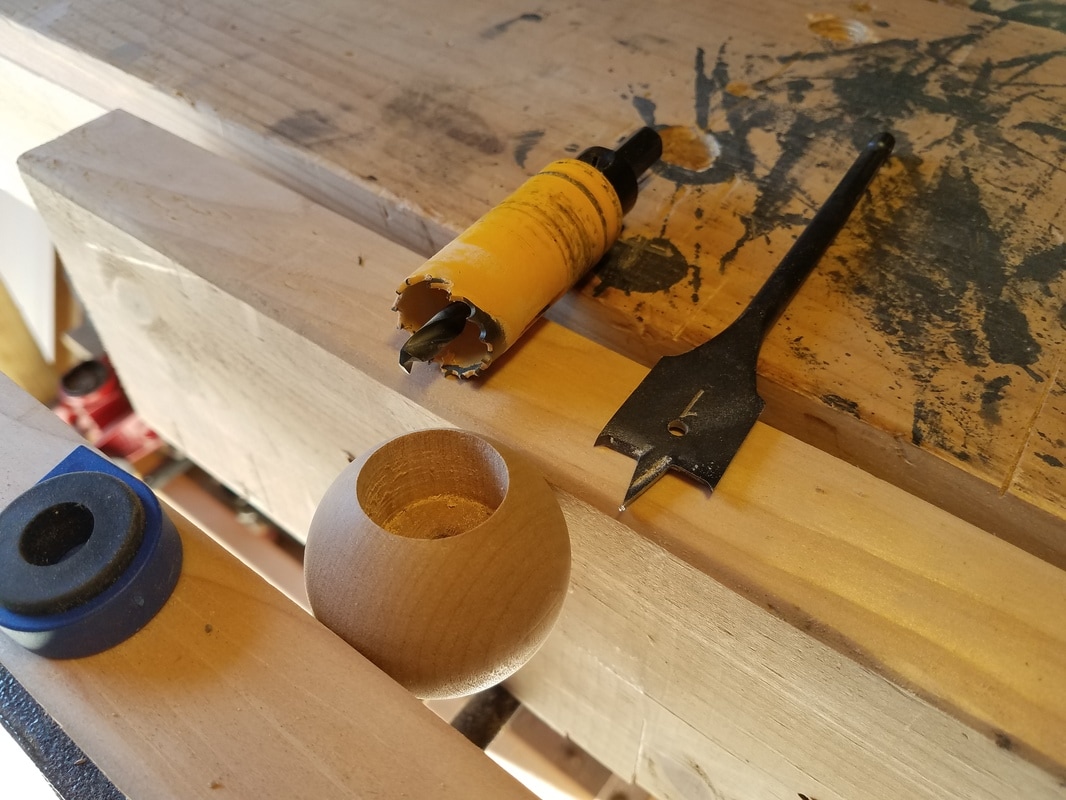 Yeesh. Next was shaping the body of the cane itself. Most of this happened out back on my bootleg shaving horse. I did almost all the work with my half-round spokeshave. I needed to reduce the diameter of the dowel by 1/8 inch at the end so it would fit the 1" hole in the ball, so I did that first. 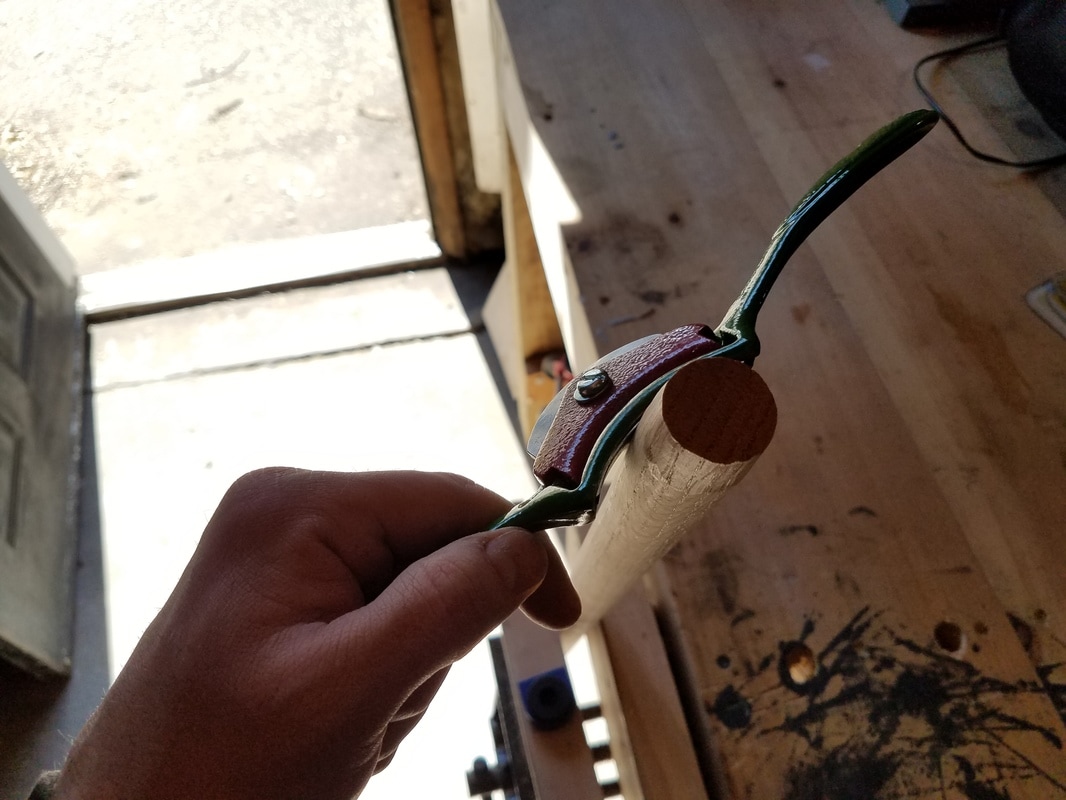 I'd say the spokeshave has paid for itself, but it was an XMas gift. Thanks, Mom-in-law! Then, I needed to add a sword-like handle just below the ball. I worked the next 6-7 inches into a pleasing oval profile that fit my hand well. Next was the body of the thing. I flattened out the middle third-ish of the dowel, aligned with the grip to lighten the cane and give it a bit of a sword-ish profile. If you land a hit, even in the middle, the reduced surface area of the narrowed edge will transfer more force to a smaller area, and the lower mass should make for a swifter swing. 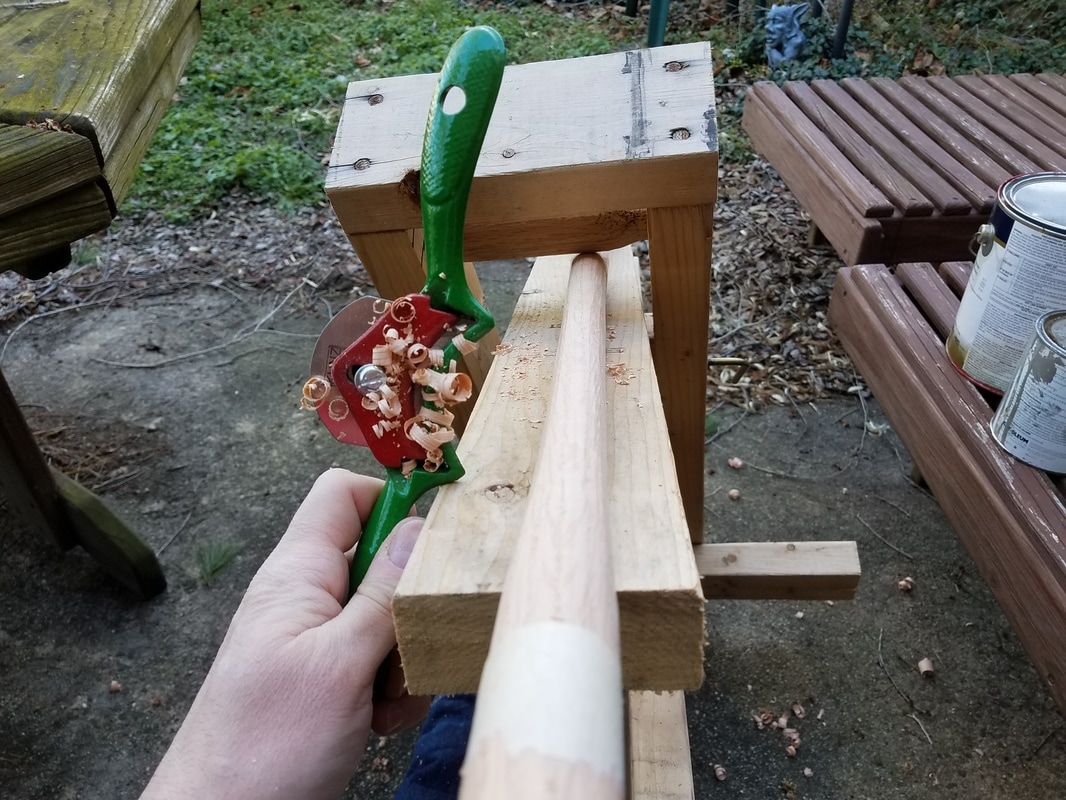 Lookit those cute curly shavings! Finally, for the end, I tapered the last 8ish inches from 1 1/8" to about 3/4", making sure to keep the cone even all the way around. This is where the shaving horse comes in really handy. It allows you to very quickly turn the piece you're working without having to fiddle over and over with a vise, giving you more opportunity to keep things even. Once I was happy with the overall shape, I glued the ball in place, then started sanding. The spoke shave did a pretty good job of leaving an even surface, so I started with 150 grit, then went to 220 after I leveled out all the high spots and dings. 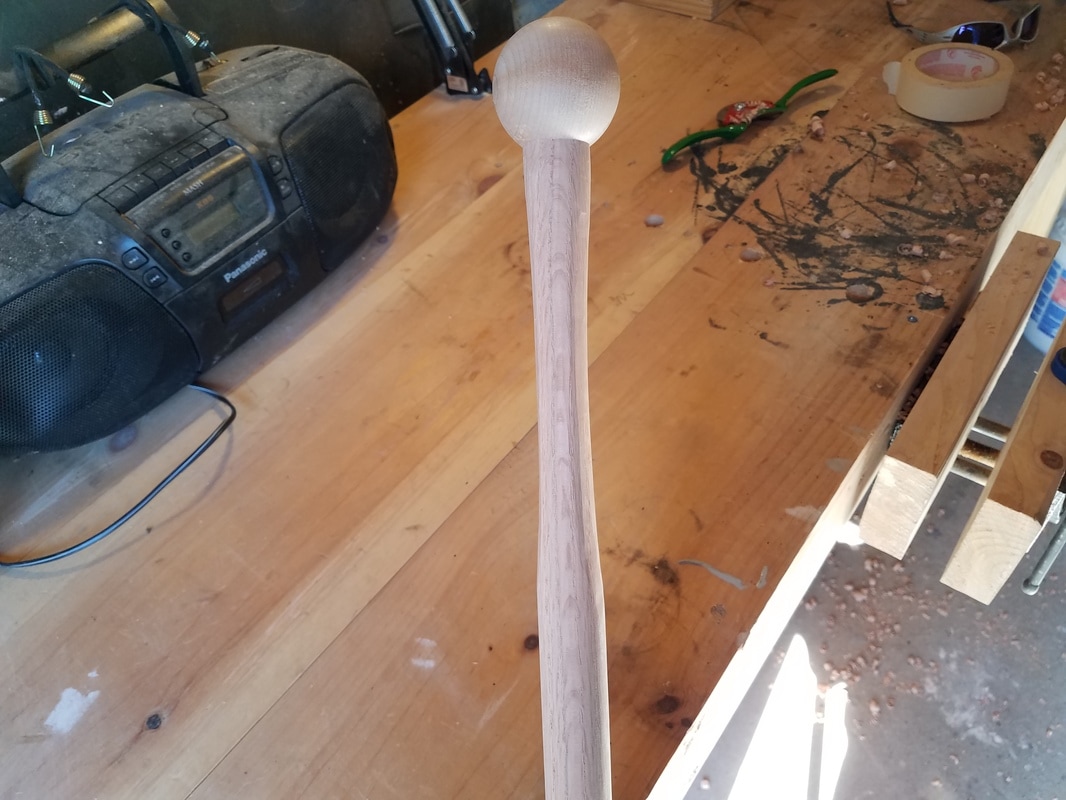 Sanding is basically the worst thing, but it makes stuff look so pretty. Once it was all smooth, I started the finishing process. I bent a finish nail into a U shape, and hung the cane upside down from the ceiling of my garage, and brushed on three layers of polyurethane, with a 220 sanding between each. 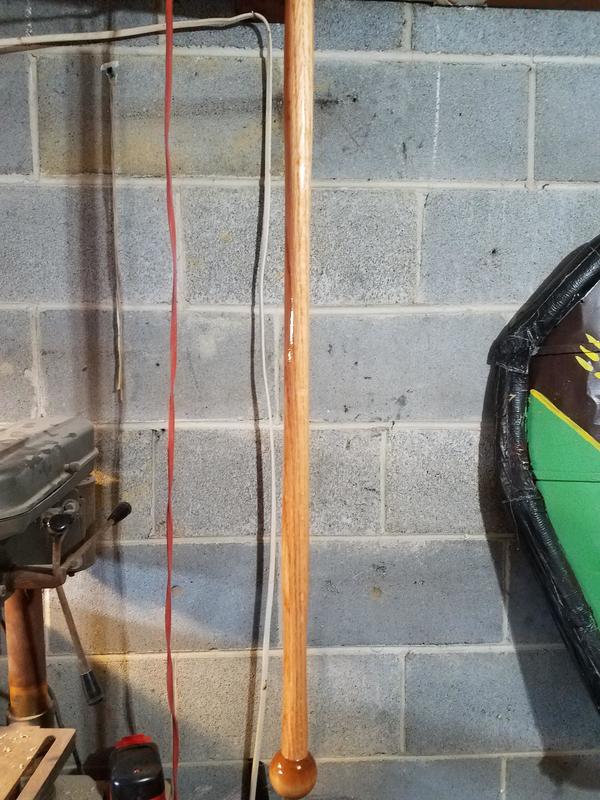 Once it was dry, the last step was to add a tip to the end, so that repeated banging against hard surfaces wouldn't chowder the wood up too bad. I don't much like the look of rubber chair tips, so I cut the top off of a 5/16" lag bolt I had laying around, and glued it into a 5/16" hole I drilled in the center of the cane's bottom. It gives a very satisfying *CLACK* when it touches down. The Final ProductI'm really happy with how this cane came out. It feels great in the hand in cane mode and in sword mode. The finish is very hard, and can baseball-swing a pine cone into the bleachers with nary a scratch. Yes, that's my very scientific method for testing wood finish. 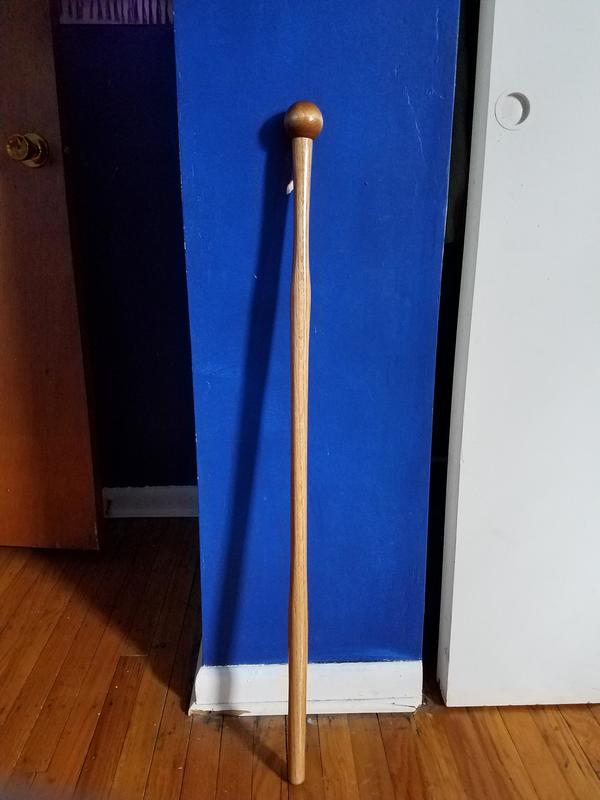 The finished cane 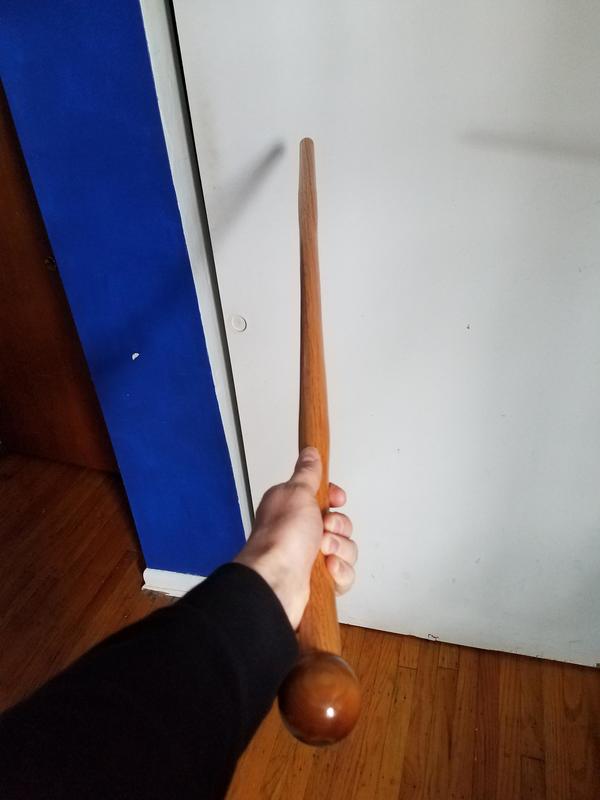 En garde!
I am going to have to be careful here, or this is just going to end up being a cooking blog. I make way too much fun stuff to concentrate only on cooking. But I don't have any making-stuff content ready to rock, so I'm going to give you a recipe for some savory, meaty pasta with a bunch of veggies snuck in, that will keep you in leftovers for (probably) days. This is a seriously versatile and flexible dish that you can mess with all day and not break it. You can cook this. I promise.
Here's what you'll need:
We don't have to do that here. Put the clove on the cutting board, then lay your knife (please tell me you have some kind of broad chef knife) flat on top of the clove, and whack it with a hand. You don't want to totally smoosh the thing, but you're not being gentle, either. The clove should be somewhat squished, and the peel should be split in a couple places. Get rid of that papery stuff, and chop the heck out of those cloves. Okay, so prep time. I believe wholly in getting as many of your ingredients ready to go before you turn on the gas. If you're easily distractible (like me) or you're not a pro on timing (like me), getting your stuff together helps a lot. So, before things get hot, do this:
Some variations, because I mentioned this stuff is versatile: If you need to sneak more vegetables into your kid's diet, this is a great way to do it. There' already one red pepper and one onion and some mushrooms, but you can jack the proportions a lot and still get something good. Add more peppers or more mushrooms. You can also add a whole bag of spinach to this stuff. I'd recommend chopping the stuff up before adding it. And for the love of crap, only use fresh spinach. Fresh will add the visual, uh, texture of little dark green specks all through the dish. Canned spinach will turn the entire thing a disgusting, pukey brown-green. TRUST ME ON THIS. Add cheese! We usually sprinkle a fair bit of pecorino romano over the finished thing, but there's no reason you can't toss a cup of grated parmesan or romano when you're mixing. The point here is that this is a nearly unbreakable recipe, and you can toss in whatever you want. It's got real food in it that you bought fresh, and it's so much more fun than spaghetti and Ragu. Try it, play with it, and let me know how it goes in the comments. No introductions. No lofty goals. I'm just diving right into my first post. Let's rock.
I am a husband and the father of a crazy little two and a half year old. Our schedules work out so that I am usually the one picking up the critter (a term of endearment, I promise) from day care, doing the shopping, and then cooking the dinner. Two years ago, the prospect of being the family's chef terrified me. The root of that fear came from the fact that I generally eat for sustenance, that is, I eat more or less on a strict routine to keep the tanks full, and I have very little trouble eating the same thing every day. My wife eats for variety and pleasure, and goes crazy if she has to eat the same thing for more than a few days straight. She's also a better cook than I am. So here I am, afraid that I'll be boring and bad at it, and getting silently judged by the wife that I'm just *terrible*. It took some talking-into-it, but I finally agreed to be the nighttime cook, with some recipe/theme/whatever advice from wifey. Fast forward two years, and I'm whipping up some pretty decent grub. Not gonna lie, some of it still comes out of cans. Some of it is the "easy version", but hey, it tastes good, gives wifey the variety she craves, doesn't cost an arm and a leg, and sustains the family for the day. Just a couple nights ago, I picked up the wee man from "school" and made my way home. There, waiting for me, was our whiteboard calendar where we coordinate our month's schedule and our weekly meal planning (hoo boy. More on meal planning in another post.) On the block for Tuesday was "Gnocchi with white beans". Lucky me, the ingredients were all laying around. Also lucky me: This is one of my favorite recipes to make AND to eat. It's hot, hearty, easy, and pretty cheap. Also lucky you, I'm going to tell you how to make it. Here's what goes into it all: 1 lb frozen gnocchi 1 big container/bag of some kind of spinach 1 white onion, roughly chopped 2/3/9 cloves of garlic (we're mostly Italian, so it's like, 12 for us), finely chopped or minced if you're fancy 1 can small white beans (habichuelas blancas) 1 can stewed & diced tomatoes A couple handfuls of shredded mozzarella A hunk of Romano or Parmesan cheese A splash of olive oil Here's how to make it: 1. Get that pasta water salted and heating up first thing. 2. Heat up a big, nonstick pan (over medium-high heat*) with that splash of olive oil. Get it hot and shimmery. 3. Toss in the garlic and onion, and get it sauteeing. 4. Open the can o' beans and rinse it out in a strainer. Once the rinse water is clear, set the strainer on top of the can to drain while you toss the onion and garlic around to keep it from burning. 5. Once the Onions are translucent (5-ish minutes) dump in the beans and toss it all around. 6. Once the beans are good and hot (another few minutes), dump in the whole can of tomatoes, juice and all. That's important, because you're going to immediately... 7. Drop all that spinach right on top and lid it tightly. The boiling tomato juice will steam the spinach. My wife tells me this is called "wilting." Sure. Wilt the spinach. It'll turn brilliant green and... 8. The water should be boiling by now. Drop in the gnocchi, and set a timer for 6-ish minutes (or whatever it tells you on the bag for firm or al-dente. It's going to cook more in a minute, and we don't want it mushy.) 9. Mix up that goodness you've got in the pan. It should look like a tiny, abstract, Italian pride celebration: All red, white, and green. That's how you know it's working. Turn the heat down to low-ish, and let it simmer while the pasta cooks. Stir it once in a while to keep yourself busy. 10. Once the pasta's done, drain it with a colander and slide it into the pan, and fold the pasta into the party happening in the pan. Be gentle. You want gnocchi, not potato mush. 11. Spread a couple handfuls of mozzarella on top, then grate some of that hard cheese on top of that. I recommend Pecorino Romano, just because I like it better than Parmesan, but it's up to you. If you don't have a goat to milk and 2 years to age your hard cheese, then store bought is just fine. 12. Lid all that for another 5 minutes until the cheese is melty and bubbly, and you're done. If nobody is headbutting you in the hip or insisting that you put out an imaginary fire, take this quiet opportunity to clean some things. The cutting board first to free up counter space, and your knife, because TAKE CARE OF YOUR KNIVES (oh, that's so going to be another post.) Then, whatever else. The pot, the strainer, and toss the cans. The idea here is to use the time you've got to get done something you HAVE to get done, before the kid gets loaded up on food and goes crazy before bed time. And you have to do a bedtime routine. And that routine is exhausting and before you know it, it's 10PM and you really, really don't want to do dishes now. Anyway, call the fam, cuz soup's on. Scoop, scarf, and sigh, cuz you just made something delicious. Good for you. Let's do it again soon. *You should never run hotter than medium-high on nonstick cookware, it chowders the coating all up and makes it into non-non-stick. I learned this after we bought a new nonstick pan because I destroyed the last one. Also: Don't flambé in nonstick. It's bad. |
AuthorI'm Dan, and I make things. Jewelry, food, carvings, Viking knotwork, and at least one child (so far). This is where I document all that stuff. Archives
May 2017
Categories |


 RSS Feed
